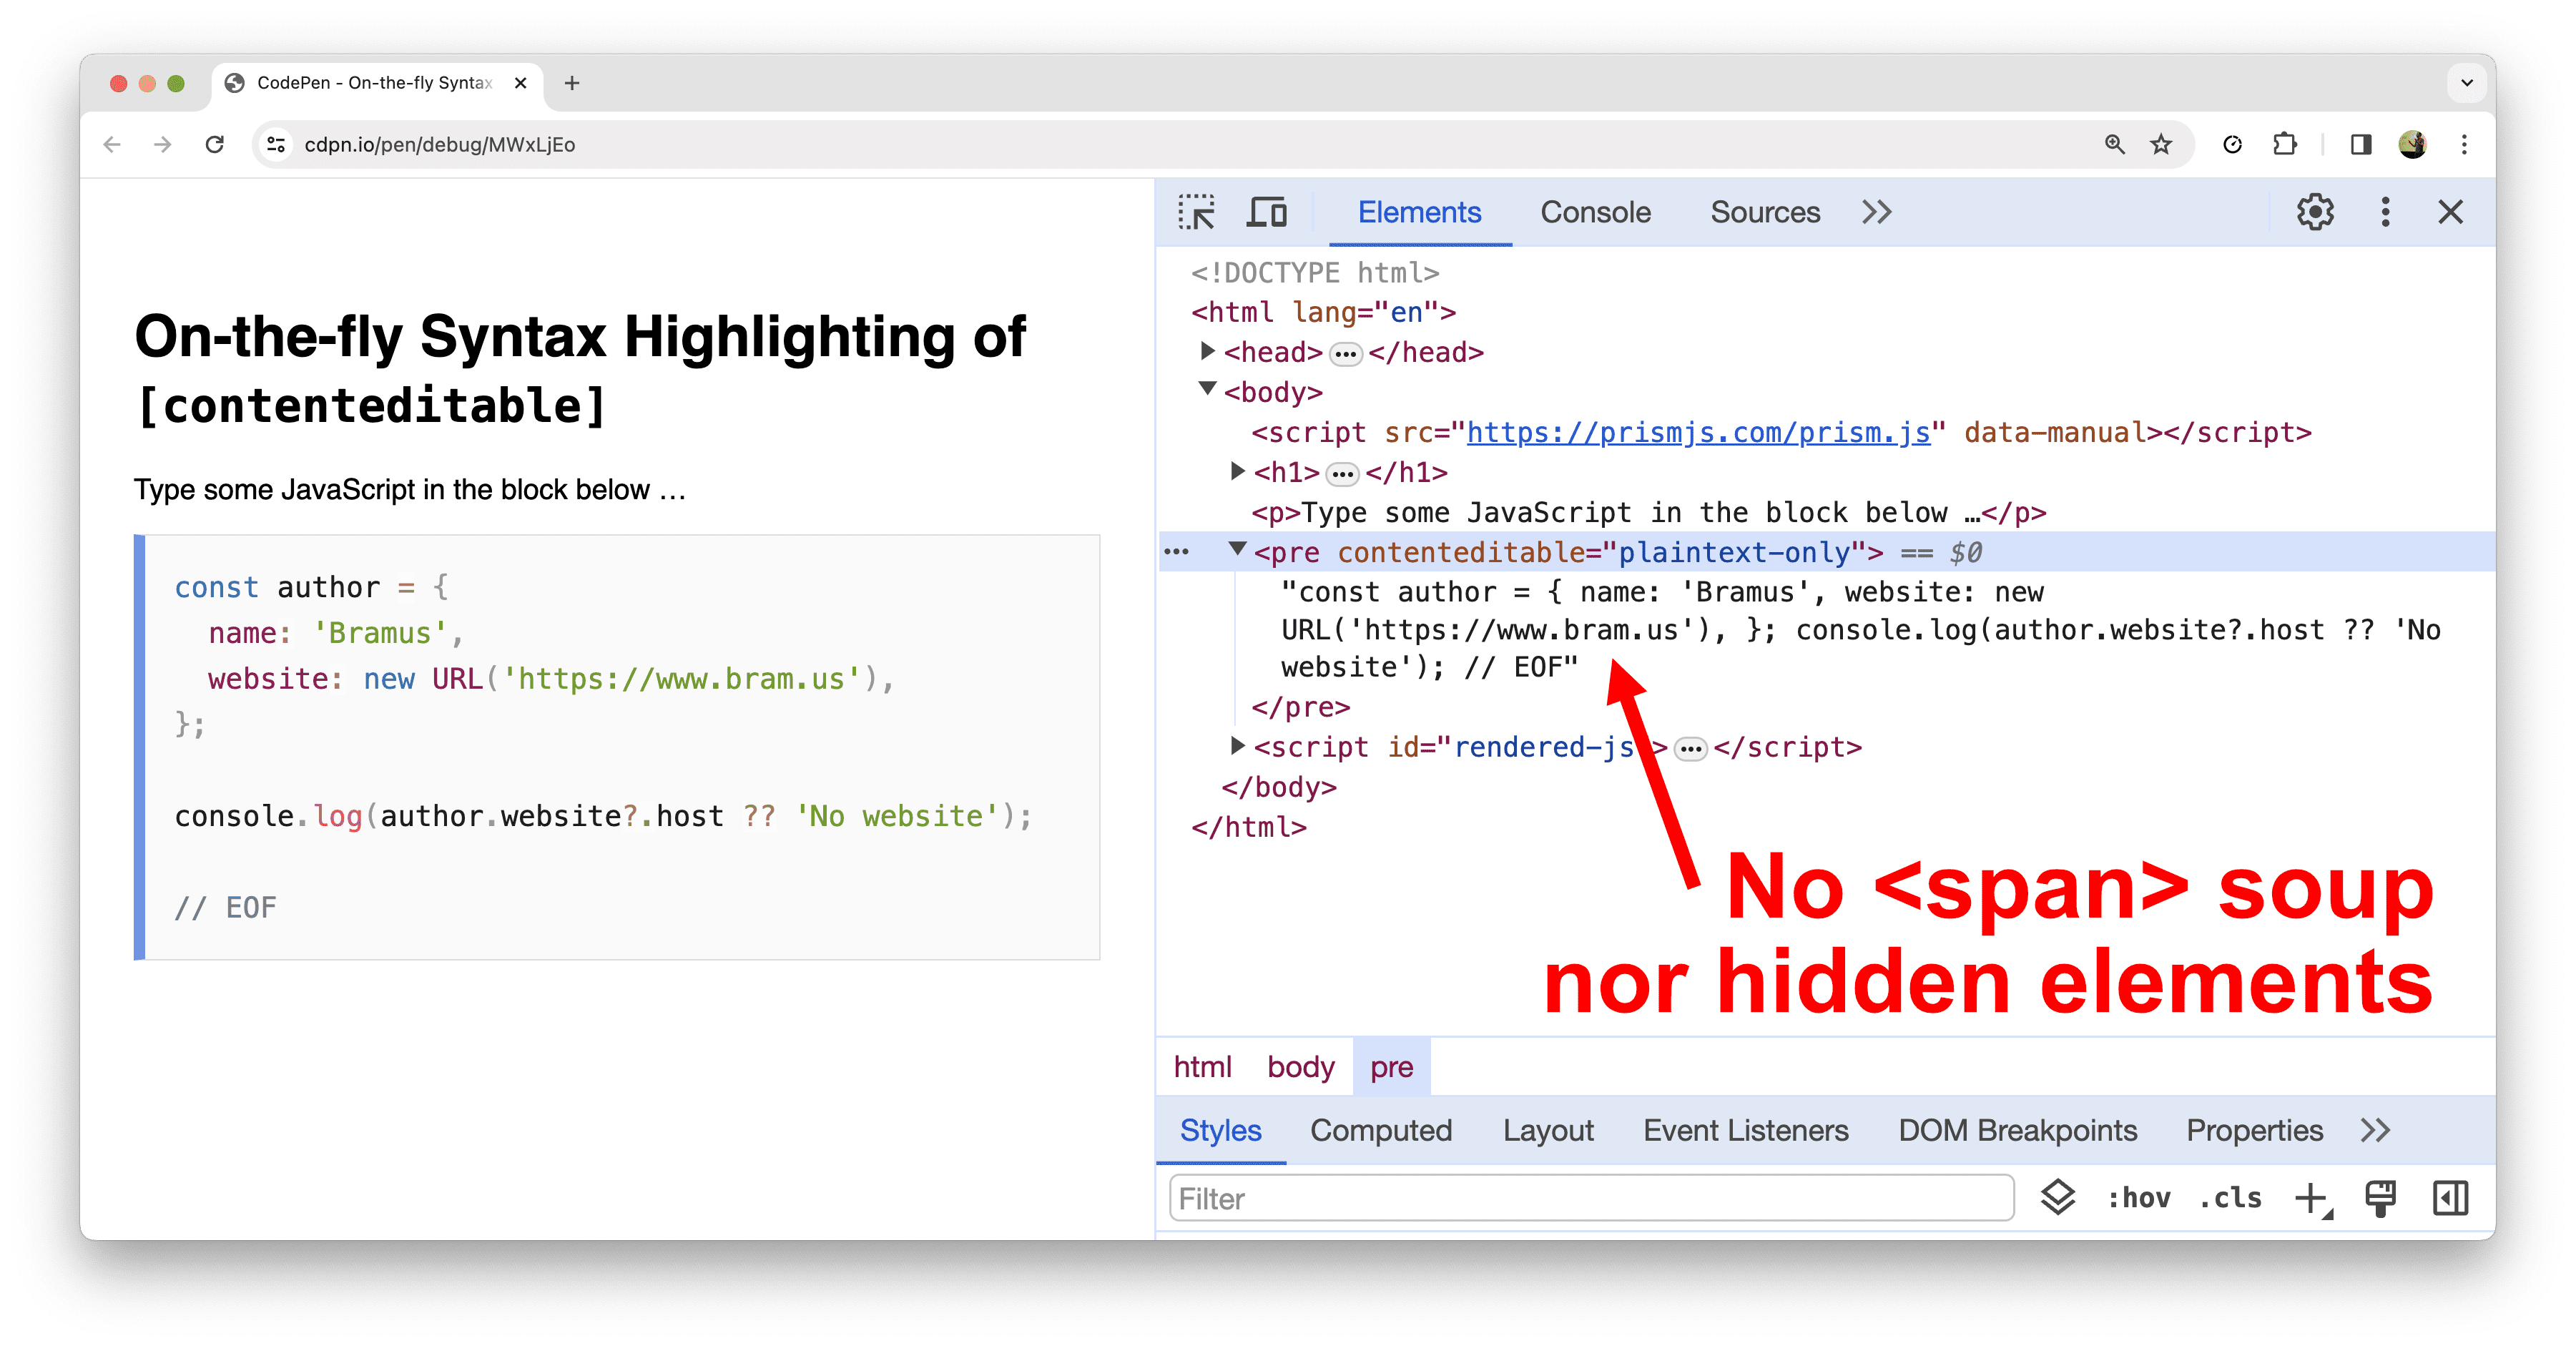
[contenteditable] code snippets demo with DevTools open. Thanks to Prism’s Tokenizer and the Custom Highlight API, the code is highlighted without the need for a bunch of <span> elements wrapped around each token.
~
The way syntax highlighters on the web typically work is a to wrap all tokens in <span> elements with a proper class and use CSS to colorize them.
Thanks to the CSS Custom Highlight API you can skip the step where you riddle your DOM tree with a bunch of <span>s to add the color information.
~
# Table of Contents
- Custom Highlight API 101
- Browser support
- Syntax Highlighting Static Code Snippets
- The downsides of the Custom Highlight API
-
On-the-fly syntax highlighting of
[contenteditable]code snippets - In Closing
- Spread the word
~
# Custom Highlight API 101
The CSS Custom Highlight API offers a mechanism for styling arbitrary ranges of a document identified by script.
Custom highlights are represented by Highlight objects. These objects hold one or more Ranges that identify which parts of the text should be highlighted. Finally, these Highlights need to be registered into the highlight registry so that you can style them from within CSS.
In code:
// Create Highlight
const h = new Highlight();

// Add ranges to the Highlight
const r1 = new Range();
r1.setStart(text.firstChild, 13);
r1.setEnd(text.firstChild, 28);
h.add(r1);

const r2 = new Range();
r2.setStart(text.firstChild, 38);
r2.setEnd(text.firstChild, 56);
h.add(r2);

// Register the highlight into the registry
// This makes the ::highlight() CSS work
CSS.highlights.set('example', h);
That last line enables the use of ::highlight(example) in your CSS to style the highlight:
::highlight(example) {
	color: hotpink;
}
You can see this code in action in this technical demo. Characters 13-28 and characters 38-56 get the hotpink color applied because they got added to the example Custom Highlight.
See the Pen CSS Custom Highlight API Example by Bramus (@bramus)on CodePen.
It is possible to register multiple highlights via CSS.highlights.set, as long as they have a different name. A Range can be added to multiple highlights – so all styles get applied – and ranges can also overlap.
A typical use-case to using the Custom Highlight API would be to highlight search results as you type in a text input. The following demo by Jen Simmons shows this:
See the Pen Custom Highlights demo by Jen Simmons (@jensimmons)on CodePen.
💁♂️ For more info on this API, go read Getting started with the CSS Custom Highlight API.
~
# Browser support
💡 Although this post was originally published in February 2024, the section below is constantly being updated. Last update: Feb, 2024.
Here is an up-to-date list of browser support for the CSS Custom Highlight API:
- Chrome (Blink)
-
✅ Supported as of Chrome 105
- Firefox (Gecko)
-
👨🔬 Experimental support in Firefox Nightly
- Safari (WebKit)
-
✅ Supported as of Safari 17.2.
The pen embedded below will indicate if the browser you are currently using supports the CSS Custom Highlight API or not:
See the Pen CSS Custom Highlight API Support Test by Bramus (@bramus) on CodePen.
To stay up-to-date regarding browser support, you can follow these tracking issues:
- Chrome (Blink): Issue #40163546 — Fixed
- Firefox (Gecko): Issue #1703961 — ASSIGNED
- Safari (WebKit): Issue #204903 — RESOLVED FIXED
~
# Syntax Highlighting Static Code Snippets
During one of the conversations at the most recent CSS Working Group F2F meeting in Mountain View, Emilio (Firefox) and Tab (Google) came up with the idea to use the Custom Highlight API to do syntax highlighting.
Taking their idea for a spin, I whipped up this CodePen. The Pen acts as its own demo: the CSS and JavaScript you see on the page is the actual code that gets executed and thereby syntax highlighted.
See the Pen Syntax highlighting code blocks with Prism and the Custom Highlight API by Bramus (@bramus) on CodePen.
Huh, you can show CSS and JavaScript directly in the HTML?!
In case you’re wondering: the trick to make inlined script and style elements visible here is to apply display: block onto them.
script[visible], style[visible] {
	display: block;
	white-space: pre;
	font-family: monospace;
	overflow-x: auto;
	…
}
Yes, that totally works! 🤩
~
# How it works
At its core, the demo consists of three steps:
- Register Custom Highlights for all possible token types
- Tokenize the code
- Associate the extracted tokens with the relevant Custom Highlight
The key part here being the tokenization step. Tokenization is the process of taking an input string and identifying the smallest individual parts (tokens) that the language can understand.
For example, when tokenizing const name = "Bramus"; as JavaScript, you end up with these tokens (ignoring whitespace):
constname="Bramus";
Each of these tokens is of a certain type in JavaScript’s Lexical Grammar. For example, the const token is a so called keyword.
~
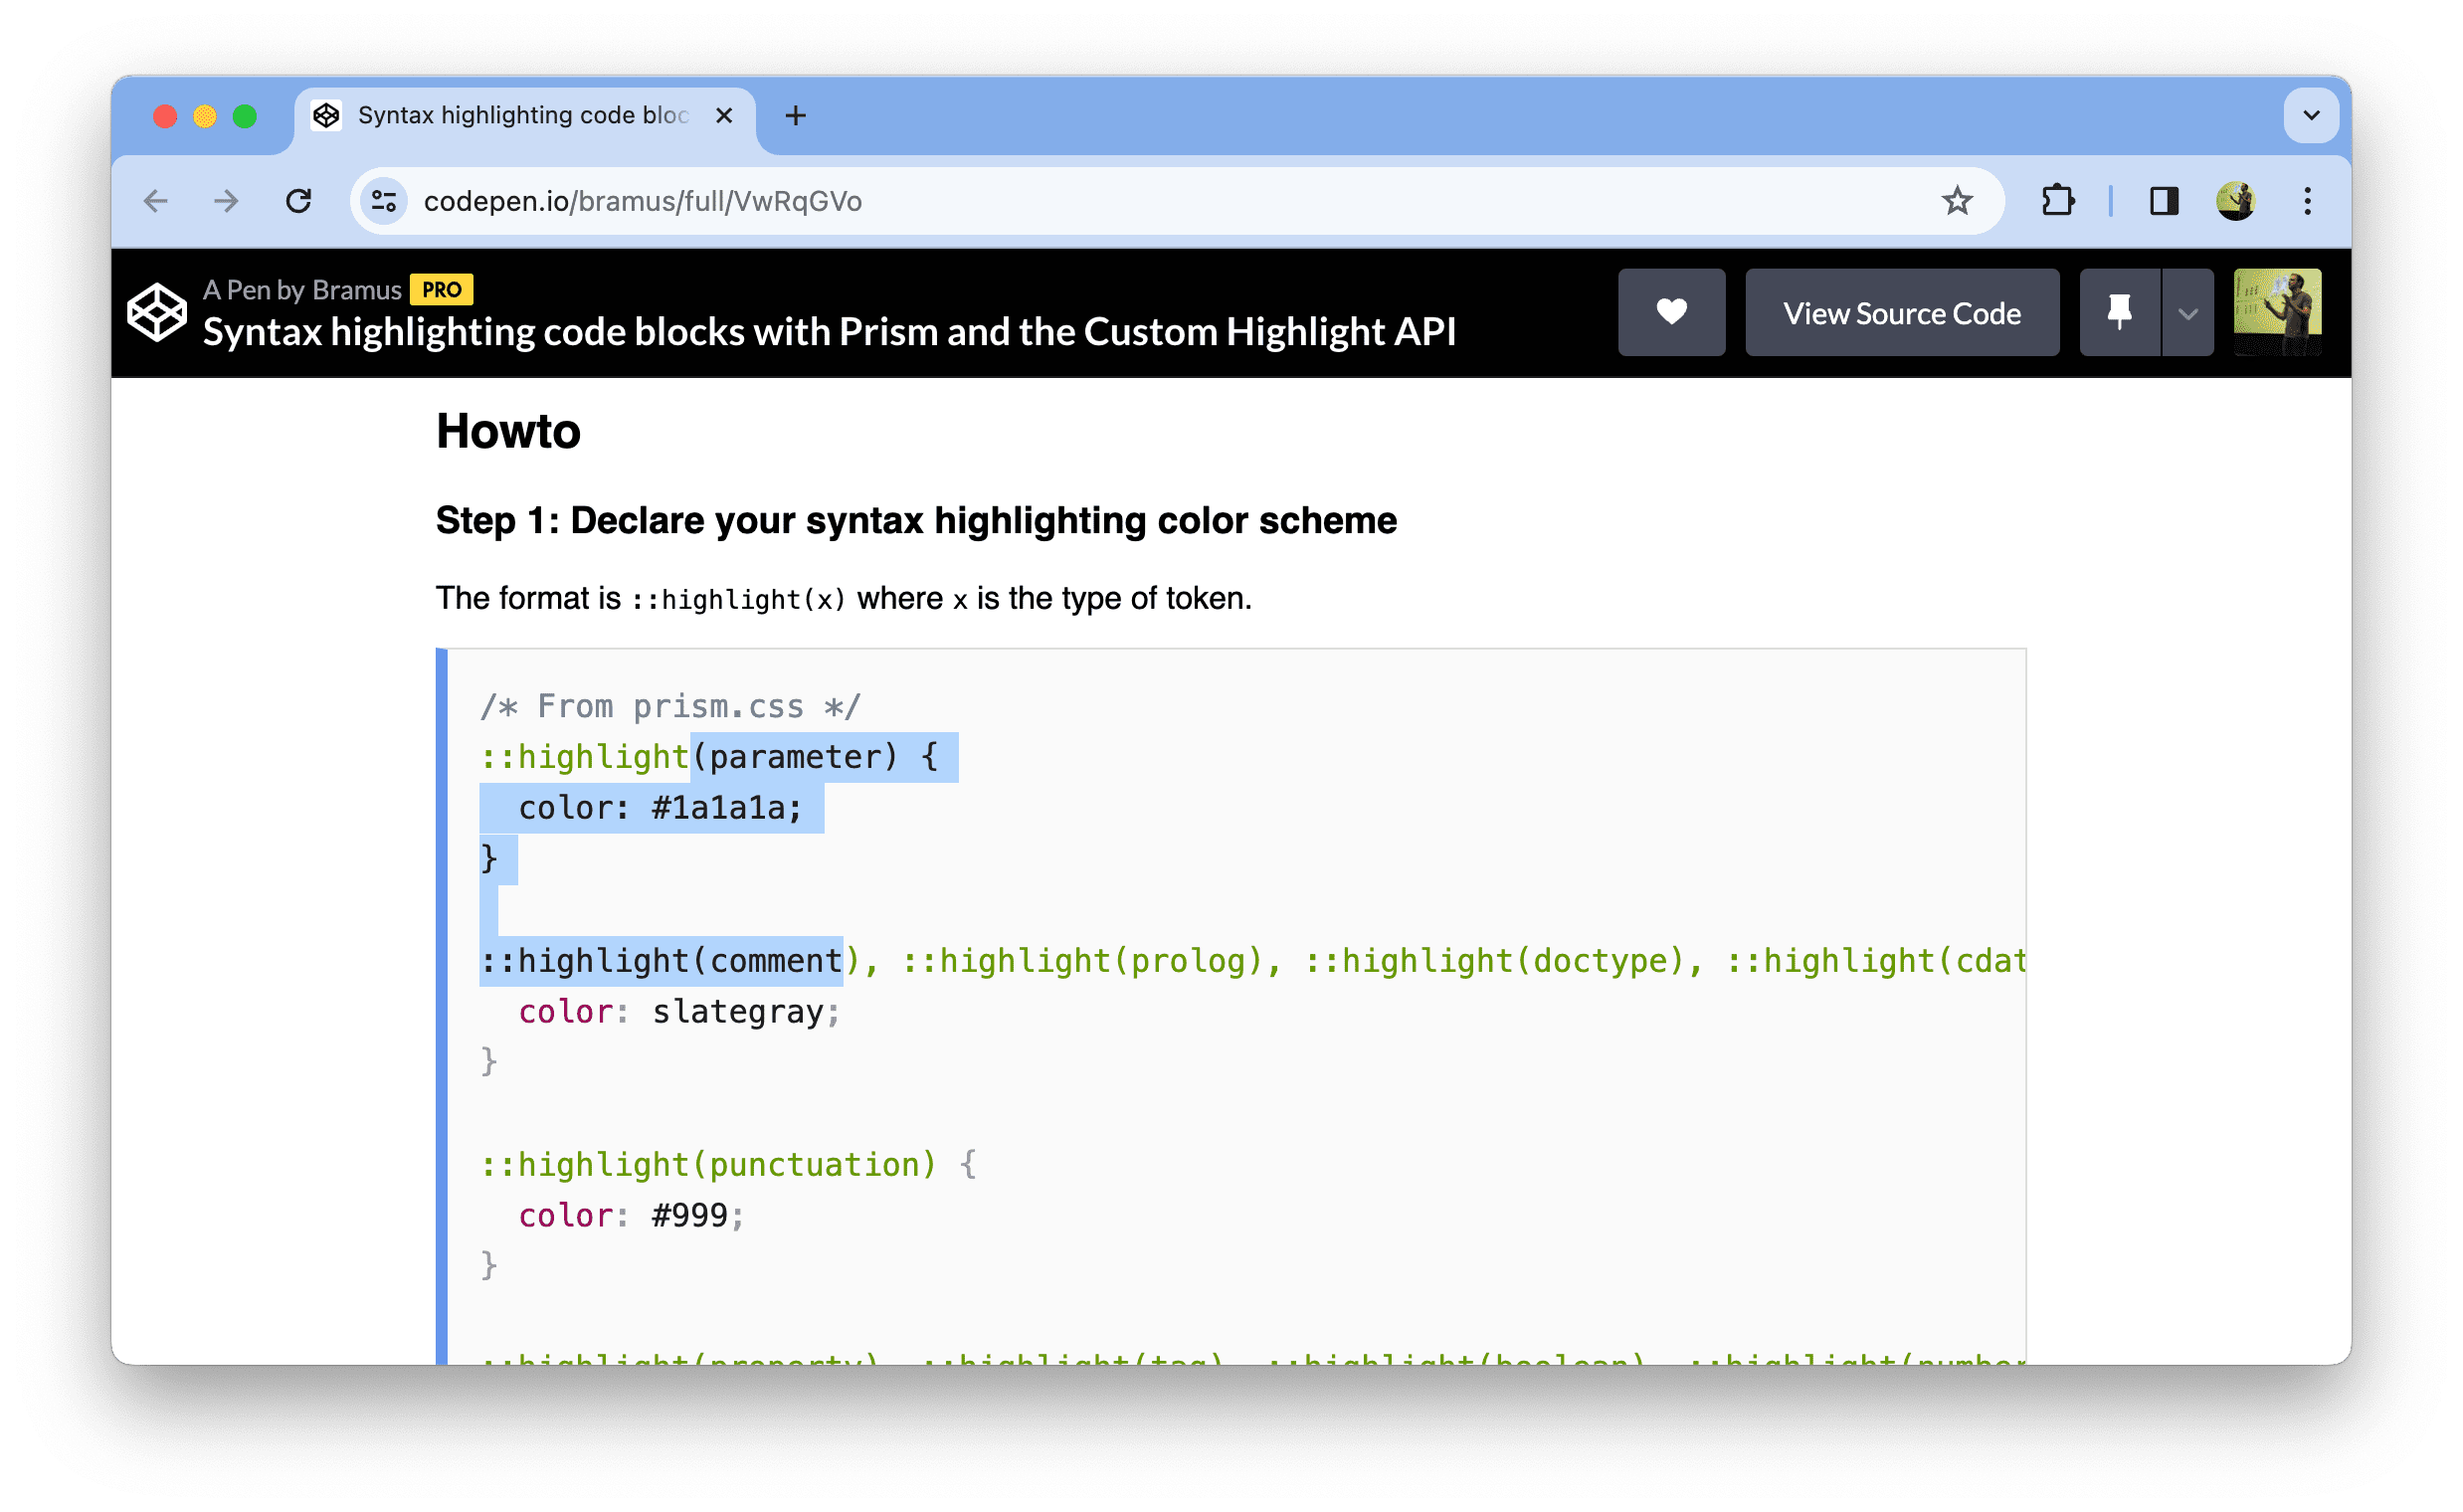
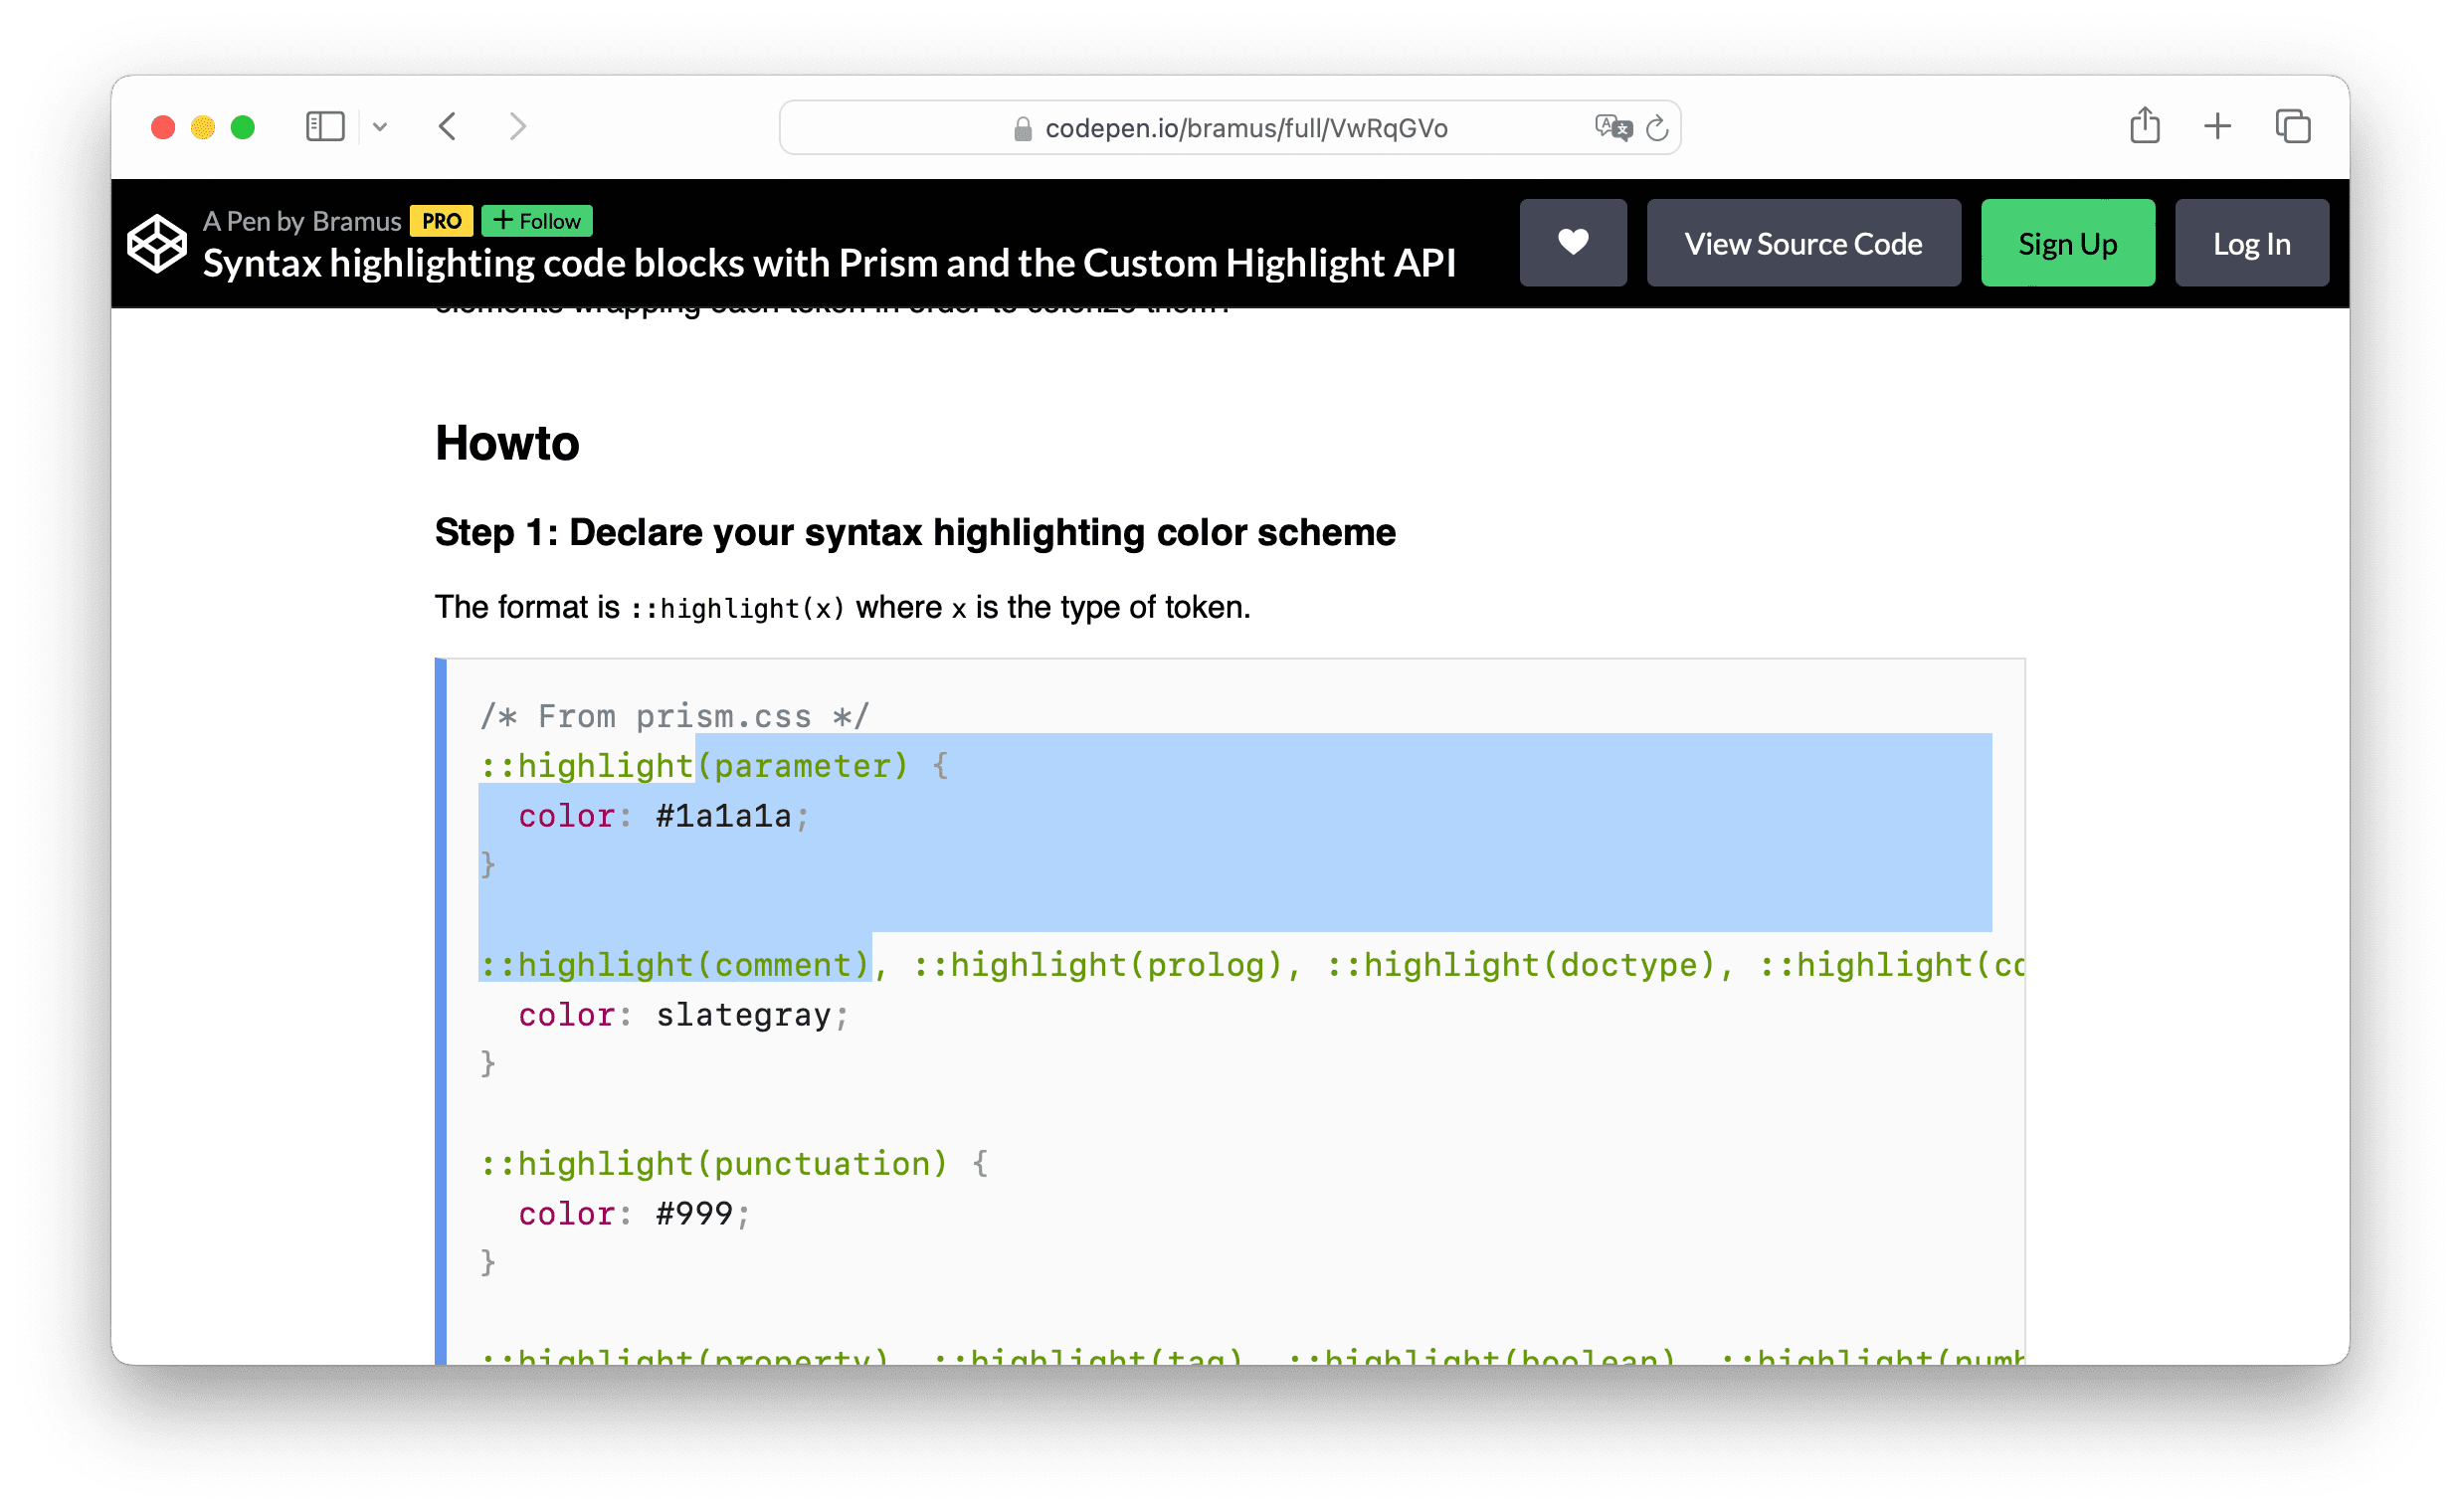
# Step 1: Setting up shop
For each token type that there is in JavaScript and CSS – the two languages the demo needs code highlighting for – the demo sets up a ::highlight pseudo:
/* From prism.css */
::highlight(parameter) {
	color: #1a1a1a;
}

::highlight(comment), ::highlight(prolog), ::highlight(doctype), ::highlight(cdata) {
	color: slategray;
}

::highlight(punctuation) {
	color: #999;
}

::highlight(property), ::highlight(tag), ::highlight(boolean), ::highlight(number), ::highlight(constant), ::highlight(symbol), ::highlight(deleted), ::highlight(class-name) {
	color: #905;
}

::highlight(selector), ::highlight(attr-name), ::highlight(string), ::highlight(char), ::highlight(builtin), ::highlight(inserted) {
	color: #690;
}

::highlight(operator), ::highlight(entity), ::highlight(url) {
	color: #a67f59;
	background: hsla(0, 0%, 100%, 0.5);
}

::highlight(atrule), ::highlight(attr-value), ::highlight(keyword) {
	color: #07a;
}

::highlight(function) {
	color: #dd4a68;
}

::highlight(regex), ::highlight(important), ::highlight(variable) {
	color: #e90;
}

::highlight(important), ::highlight(bold) {
	font-weight: bold;
}

::highlight(italic) {
	font-style: italic;
}

::highlight(entity) {
	cursor: help;
}
These styles are borrowed from Prism.js, which is used to do the tokenization in step 2 further down.
The CSS is useless without having registered the custom highlights, so to make them usable you need to register 1 highlight for each token type:
const tokenTypes = [ 'comment', 'prolog', 'doctype', 'cdata', 'punctuation', 'namespace',
	'property', 'tag', 'boolean', 'number', 'constant', 'symbol', 'deleted',
	'selector', 'attr', 'string', 'char', 'builtin', 'inserted', 'operator',
	'entity', 'url', 'string', 'atrule', 'attr', 'keyword', 'function', 'class',
	'regex', 'important', 'variable', 'important', 'bold', 'italic', 'entity',
	'parameter', 'class-name'];

tokenTypes.forEach(tokenType => {
	CSS.highlights.set(tokenType, new Highlight());
});
~
# Step 2: Tokenizing the code
<script src="prism.js" data-manual></script>With Prism loaded in manual mode, you can run its tokenizer on demand:
// Get all inlined script and style blocks
const codeBlocks = document.querySelectorAll('script[visible], style[visible]');

// Loop ’m one by one
for (const codeBlock of codeBlocks) {

	// Tokenize it.
	// When it’s a STYLE element, tokenize it as CSS. Otherwise, assume JavaScript.
	let tokens = Prism.tokenize(
		codeBlock.innerText,
		codeBlock.tagName == 'STYLE' ? Prism.languages.css : Prism.languages.javascript
	);

	// …
}
Calling Prism.tokenize gives back a list of tokens that holds information about which token is where. For example:
[
	{
		"type": "keyword",
		"content": "const",
		"length": 5
	},
	" name ",
	{
		"type": "operator",
		"content": "=",
		"length": 1
	},
	" ",
	{
		"type": "string",
		"content": "\"Bramus\"",
		"length": 8
	},
	{
		"type": "punctuation",
		"content": ";",
		"length": 1
	}
]
~
# Step 3: Associating the tokens with the highlights
To associate the extracted tokens with their relevant highlight, it’s a matter of looking all tokens and determining their start and end position within the original source code.
// Position within the code
let pos = 0;

// Loop all tokens
for (const token of tokens) {
	if (token.type) {
		// Create new range for the current token
		const range = new Range();
		range.setStart(codeBlock.firstChild, pos);
		range.setEnd(codeBlock.firstChild, pos + token.length);

		// Add the range to the registered highlight
		CSS.highlights.get(token.alias ?? token.type)?.add(range);
	}

	// Update position
	pos += token.length;
}
And with that, the code snippets are syntax highlighted using the CSS Custom Highlight API 🙂
~
# The downsides of the Custom Highlight API
Unfortunately it’s not all rainbows and unicorns with the Custom Highlight API, as it comes with some limitations and has some implementation bugs.
~
# Limited Styling Options
Just like the case with regular highlights, the styling of highlights is limited to only a small set of CSS properties that do not affect layout. Only allowed properties are color, background-color, text-decoration, text-shadow, stroke-color/fill-color/stroke-width, and custom properties.
That means you can’t change text to be bold or italic, something is often used when highlighting code snippets. At the CSS WG, w3c/csswg-drafts#8355 was raised to see if more styles could be allowed or not.
~
# No textareas
Custom Highlights don’t work on textareas. I’m not entirely sure if this is an implementation bug of a limitation of the spec. I’ve filed w3c/csswg-drafts#9971 at the CSS WG to discuss this.
[contenteditable], which I explore further down this post: On-the-fly syntax highlighting of [contenteditable] code snippets~
# No pointer events (yet)
Any of the Custom Highlights don’t have pointer events. That means that if you, for example, hover a Custom Highlight, you can’t show a tooltip when hovering that specific highlight.
The CSS Working Group has resolved on adding CSS.highlights.highlightsFromPoint(x, y) that would eventually allow this. It would work something like this:
document.addEventListener("click", function(e) {
	if (e.defaultPrevented) {
		return;
	}

	for (let highlight of CSS.highlights.highlightsFromPoint(e.clientX, e.clientY)) {
		highlight.dispatchEvent(e);
		if (e.defaultPrevented) return;
	}
});
Problem at the time of writing is that this feature is still in its very early stages: it lacks a specification, tests, and – more importantly – an implementation.
~
# (Chrome/Firefox Bug) Color information gets lost on selecting text
UPDATE 2024.04.22 – This bug got fixed in Chrome 126.0.6426.0 (see screenshots in this tweet)
Both in Chrome and Firefox there is a loss of color information when selecting text that has custom highlights. Safari is not affected by this.
For Chrome specifically, I have filed CrBug 325442893 for this.
~
# (Chrome/Safari Bug) Performance regression with many highlights
UPDATE 2024.04.09 – Chrome 125 sports some improvements to scroll performance with Custom Highlights. While initial paint still does take a lot of time, scrolling itself is much much smoother (see screenshots in this tweet).
Highlighting something like the jQuery Source Code with Custom Highlights takes its toll on the browser. Highlighting the 63338 tokens that make up the unminimized jQuery 3.7.1 source code is possible but when performing a scroll, the performance just tanks.
This drop in scroll performance is noticeable in Chrome and Safari; Firefox seems to deal with it pretty much fine. Chrome 122 performs the worst here, but Chrome 124 (current Canary) already sports some good improvements in this area.
For Chrome specifically, I have filed CrBug 325589486 for this.
In general though, the Custom Highlight API performs better than the heavy DOM tree approach. It’s only when crossing a certain amount of tokens that the old approach turns out to be better. I don’t know the exact number that marks the cutoff point. Feel free to test and let me know 😉
~
# On-the-fly syntax highlighting of [contenteditable] code snippets
With not being able to use the Custom Highlight API textarea elements, I wondered if we could make a on-the-fly syntax highlighter using a <pre> element with [contenteditable].
The short answer here is yes, as demonstrated in the following demo. Every time you type in a character, the current highlights get cleared, the code re-tokenized, and the new highlights get applied.
See the Pen On-the-fly Syntax Highlighting of [contenteditable] by Bramus (@bramus) on CodePen.
The long answer is creating this editor came with a set of complications introduced by [contenteditable] itself.
The first thing I had to do was disable rich text editing which [contenteditable] gives you out-of-the-box – e.g. hitting CMD+B allows making text bold. This can easily be disabled by setting the value of [contenteditable] to plaintext-only. Firefox doesn’t support this value but does support [contenteditable=true] so that browser gets a special treatment
// The pre element that can be edited
const codeBlock = document.querySelector('pre[contenteditable]');

// Allow only plaintext editing
// Firefox doesn’t do 'plaintext-only', but does do 'true'
codeBlock.setAttribute('contenteditable', 'plaintext-only');
if (codeBlock.contentEditable != 'plaintext-only') {
	codeBlock.setAttribute('contenteditable', 'true');
}
The biggest challenge was that [contenteditable="plaintext-only"] still uses HTML breaks from time to time and also creates new text nodes in the <pre> element whenever you hit return.
To cater for this I ended up adding some logic that would flatten the number of text nodes to just 1 before the tokenizing step. This also required me to add some extra logic to make sure the curser position is retained.
UPDATE 2024.04.09 Turns out there is a built-in method to achieve what I want: Node.normalize();. With that, the code becomes as simple as this:
const flattenTextNodes = codeBlock => codeBlock.normalize();Thanks to reader Amin E for letting me know about this.
For reference, the code I had before Amin E told me about Node.normalize();
// Helper function to get the caret position inside an element
// Plays nice with an element having multiple text nodes as its children
const getCaretPosition = (el) => {
	const selectionInfo = window.getSelection(el);
	let node = selectionInfo.anchorNode;
	let pos = selectionInfo.anchorOffset;

	// Need to loop all previous siblings here becase you only get the position
	// in the current text node, so we need to offset the previousSibling here
	// TODO: This might need a rewrite to make sure it only loops textNodes
	while (node.previousSibling) {
		pos += node.previousSibling.length;
		node = node.previousSibling;
	}

	return pos;
}

// Helper function to flatten the text nodes in an element to
// only 1
const flattenTextNodes = (codeBlock) => {
	if (codeBlock.childNodes.length > 1) {
		// Record current caret position
		const caretPosition = getCaretPosition(codeBlock);

		// Set firstChild to hold the whole text
		codeBlock.firstChild.textContent = codeBlock.firstChild.wholeText;

		// Remove all other text nodes
		let node = codeBlock.firstChild;
		while (node.nextSibling) {
			codeBlock.removeChild(node.nextSibling);
		}

		// Restore caret position
		// @TODO: There is 1 little bug: when selecting the entire last line and hitting
		// backspace, you end up at position 0;
		window.getSelection(codeBlock).setPosition(codeBlock.firstChild, caretPosition);
	}
}
This flattenTextNodes helper gets called right before the code gets tokenized. It gets the job done, but also introduces FOUC upon adding lines to the [contenteditable]
The combined code to highlight a codeBlock becomes this:
const highlight = (codeBlock, lang = Prism.languages.javascript) => {
	// We need the contenteditable to hold only 1 child textNode that
	// contains all the text. If we don’t do this, the highlight ranges
	// might go out of bounds.
	flattenTextNodes(codeBlock);

	// Tokenize the code
	let tokens = Prism.tokenize(
		codeBlock.innerText,
		lang
	);

	// Clear all current highlights
	tokenTypes.forEach(tokenType => {
		CSS.highlights.get(tokenType).clear();
	});

	// Paint all token highlights
	paintTokenHighlights(codeBlock, tokens);
}
For completeness, I also added a little tad of JS to map the TAB key to actually inserting a TAB character:
codeBlock.addEventListener('keydown', e => {
	// The tab key should insert a tab character
	if (e.keyCode == 9) {
		document.execCommand('insertHTML', false, '	');
		e.preventDefault();
	}
});
~
# In Closing
I must say I’m pretty excited about the Custom Highlight API and what it allows to do. However, I do hope some of the current gaps can be fixed to make this API workable under all conditions. [contenteditable] in itself could also use some love and interop-pushing.
~
# Spread the word
To help spread the contents of this post, feel free to retweet the announcements made on social media:
Y’all seem to like the posts on using the Custom Highlight API with @prismjs to syntax highlight code …
So here’s a full article digging into the details + a new demo that does on-the-fly highlighting of code you type into a [contenteditable] element.https://t.co/d98PVlHPKh pic.twitter.com/bjH3rHhhy6
— Bramus (@bramus) February 18, 2024
~
🔥 Like what you see? Want to stay in the loop? Here's how:
Leave a comment